The Argosy Solar Project

The Argosy Solar Project |
|
|
|
|
|
Dave & Ann WBCCI: 5074
|
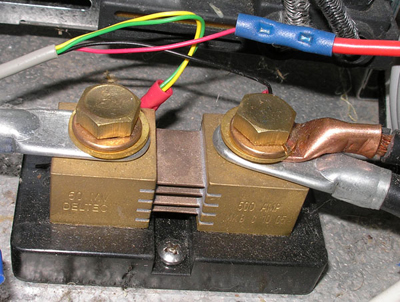
Everything worked just as advertised. The panels were putting out 6-7 amps in the noon day sun and we could dry camp in a Wal-Mart parking lot overnight and still have more than 50% battery left the next morning. Once we got under way, between the solar panels and the charge line from the tow vehicle, the batteries were usually fully charged (if it was sunny out) by early afternoon. However... it was difficult to determine just how "full" the batteries were at any given time. You determine this by the voltage of the batteries. Fully charged is 14 volts, and "dead" is 10.5 volts. So 50% discharged is supposedly somewhere between 12.0 & 12.5 volts (the "experts" tend to disagree on this subject). However it's not even THAT simple, as the observed battery voltage changes depending how large a load is currently on the batteries. Ideally you need to measure the battery voltage after the battery has been at rest (no charging or discharging) for three hours. That is near impossible when you are living in the trailer. The bottom line is that we just weren't comfortable with only using voltage as a battery level indicator. The solution was to install a Net Amp-Hour Meter that actually measures your battery usage. You insert a device called a shunt in the negative lead coming from your battery bank. You then hook the meter on each side of the shunt. The meter measures how much current is flowing across the shunt in either direction (charging or discharging) and it keeps track of how "full" the battery bank actually is. The meter I used is called the Tri-Metric from Bogart Engineering. I purchased the meter, shunt, mounting case for the meter and fuse holder for about $200. The meter is wired to the shunt using four lead telephone or cat-5 networking cable. Here is a photo of the shunt:
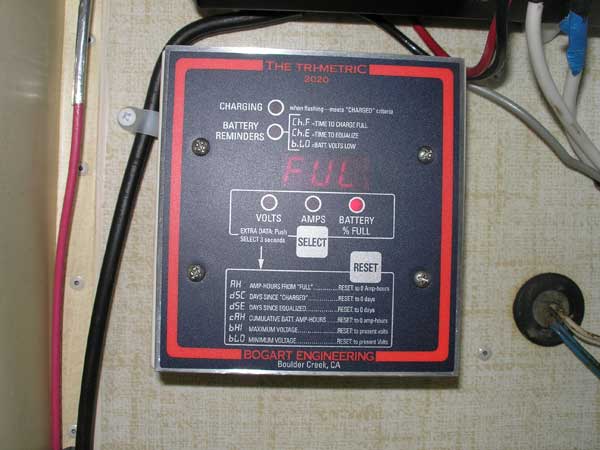
The gray phone cable with the multi colored leads goes to the meter. You can see the meter here:
The Meter is capable of displaying:
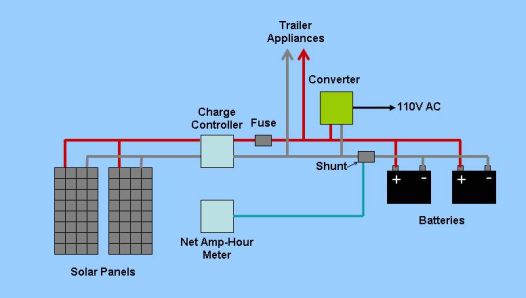
In order for this device to work correctly, you need to know your battery bank's capacity, in amp-hours. You can either guess (the manual suggests 60%-75% of actual battery rating) or you can measure it by putting a load on the battery bank until they are discharged. You then read how many amp-hours were used on the meter (the Amp Hours from Full value). I chose to measure it. The manual says to fully charge your batteries, then discharge your battery bank till it reaches 11 volts (10.5 is considered totally dead). My two 55 amp-hour batteries had produced over 95 amp-hours, which is well above 75% of rated capacity. Not bad for two year old batteries! Here is the final wiring diagram for the entire system:
I have heard that there are Solar Charge Controllers that have integrated net amp-hour meters. However, since I already had my charge controller, I didn't want to have to buy a new one. Not everyone needs a net amp-hour meter, but it was worth it for me. Both my wife and I like to see how much we are using. We no longer sit in the dark worrying about if there is enough juice in the batteries to power the refrigerator! Next: Summary
This site was last updated 10/12/07 |